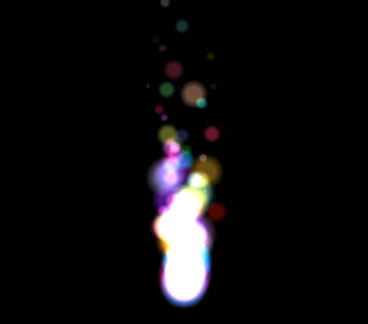
Tuần trước mình đã giới thiệu tới các bạn bài viết Tạo biểu đồ Gauge bằng HTML5 Canvas và Javascript để làm quen với cách sử dụng HTML5 Canvas. Và trong tuần này, mình sẽ tiếp tục mang đến cho các bạn thêm hiệu ứng đốm lửa cực cool. Qua bài viết này, các bạn sẽ có thêm kinh nghiệm trong việc sử dụng canvas và đặc biệt là có thể ứng dụng ngay hiệu ứng này cho những trang tổ chức sự kiện sinh nhật hay tiệc tùng.

HTML
Như thường lệ, chúng ta vẫn chỉ cần một phần tử canvas để tạo hiệu ứng.
<!-- Lets make a cool flame effect -->
<canvas id="canvas"></canvas>
CSS
Các bạn chỉ cần áp dụng định dạng đơn giản như sau:
* {margin: 0; padding: 0;}
#canvas {display: block;}
Javascript
Và đây là toàn bộ đoạn script sẽ giúp các bạn tạo hiệu ứng đốm lửa :
<script language="JavaScript">
window.onload = function(){
	var canvas = document.getElementById("canvas");
	var ctx = canvas.getContext("2d");

	//Make the canvas occupy the full page
	var W = window.innerWidth, H = window.innerHeight;
	canvas.width = W;
	canvas.height = H;

	var particles = [];
	var mouse = {};

	//Lets create some particles now
	var particle_count = 100;
	for(var i = 0; i < particle_count; i++)
	{
		particles.push(new particle());
	}

	//finally some mouse tracking
	canvas.addEventListener('mousemove', track_mouse, false);

	function track_mouse(e)
	{
		//since the canvas = full page the position of the mouse
		//relative to the document will suffice
		mouse.x = e.pageX;
		mouse.y = e.pageY;
	}

	function particle()
	{
		//speed, life, location, life, colors
		//speed.x range = -2.5 to 2.5
		//speed.y range = -15 to -5 to make it move upwards
		//lets change the Y speed to make it look like a flame
		this.speed = {x: -2.5+Math.random()*5, y: -15+Math.random()*10};
		//location = mouse coordinates
		//Now the flame follows the mouse coordinates
		if(mouse.x && mouse.y)
		{
			this.location = {x: mouse.x, y: mouse.y};
		}
		else
		{
			this.location = {x: W/2, y: H/2};
		}
		//radius range = 10-30
		this.radius = 10+Math.random()*20;
		//life range = 20-30
		this.life = 20+Math.random()*10;
		this.remaining_life = this.life;
		//colors
		this.r = Math.round(Math.random()*255);
		this.g = Math.round(Math.random()*255);
		this.b = Math.round(Math.random()*255);
	}

	function draw()
	{
		//Painting the canvas black
		//Time for lighting magic
		//particles are painted with "lighter"
		//In the next frame the background is painted normally without blending to the
		//previous frame
		ctx.globalCompositeOperation = "source-over";
		ctx.fillStyle = "black";
		ctx.fillRect(0, 0, W, H);
		ctx.globalCompositeOperation = "lighter";

		for(var i = 0; i < particles.length; i++)
		{
			var p = particles[i];
			ctx.beginPath();
			//changing opacity according to the life.
			//opacity goes to 0 at the end of life of a particle
			p.opacity = Math.round(p.remaining_life/p.life*100)/100
			//a gradient instead of white fill
			var gradient = ctx.createRadialGradient(p.location.x, p.location.y, 0, p.location.x, p.location.y, p.radius);
			gradient.addColorStop(0, "rgba("+p.r+", "+p.g+", "+p.b+", "+p.opacity+")");
			gradient.addColorStop(0.5, "rgba("+p.r+", "+p.g+", "+p.b+", "+p.opacity+")");
			gradient.addColorStop(1, "rgba("+p.r+", "+p.g+", "+p.b+", 0)");
			ctx.fillStyle = gradient;
			ctx.arc(p.location.x, p.location.y, p.radius, Math.PI*2, false);
			ctx.fill();

			//lets move the particles
			p.remaining_life--;
			p.radius--;
			p.location.x += p.speed.x;
			p.location.y += p.speed.y;

			//regenerate particles
			if(p.remaining_life < 0 || p.radius < 0)
			{
				//a brand new particle replacing the dead one
				particles[i] = new particle();
			}
		}
	}

	setInterval(draw, 33);
}
</script>
Mình hy vọng qua bài viết này, các bạn sẽ hiểu và có thể sáng tạo thêm nhiều hiệu ứng khác từ phần tử html5 canvas.
Chúc các bạn thành công !
Chuyên Mục: HTML5, Javascript
Bài viết được đăng bởi webmaster


